Rosterfy's workforce recruitment capabilities enable you to manage applications and role-specific onboarding journey's. This article will take you through the settings and setup required to turn on Rosterfy's Recruitment features.
Default Settings
Allow Role Applications
To allow 'Role Applications', go to Organisation Settings > Headcount > 'Allow Applications for Roles'
- Select Yes

Allow Pubic Browsing of Roles
To allow users to browse roles without logging in, go to Organisation Settings > Headcount > Allow public browsing of roles
- Select Yes

Default Applied Role Status
To set the default status given to a candidate that applies to a role, go to Organisation Settings > Headcount > Default Applied Role Status

Default Withdrawn Role Status
To set the default status given to a candidate that withdraws from a role, go to Organisation Settings > Headcount > Default Withdrawn Role Status

Journey/Role Application Settings Overview - Watch Video

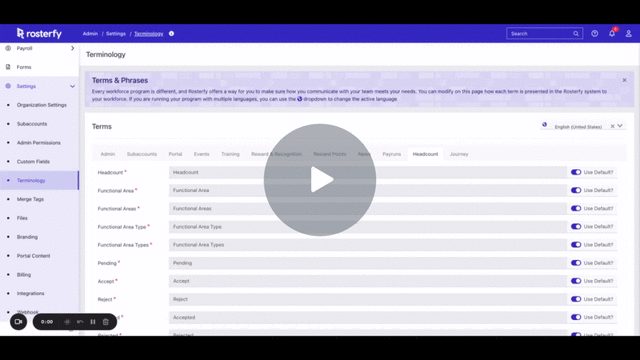
Default Terminology
You may wish to change some of the default terminology used to suit your requirements.
Go to Settings > Terminology > Headcount
System Terminology for Role Applications - Watch Video
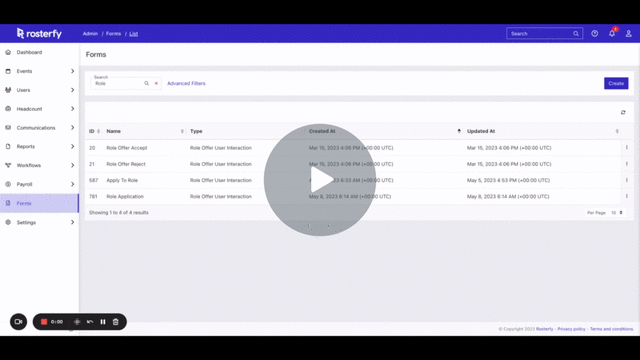
Creating a Role Application Form
An application form can be created and attached to a Role. If you choose to attach an application form to the role, this will be the first requirement in the role application process.
Go to Forms > Create > Role Offer User Interaction
Add required fields to the form
Create A Role Application Form - Watch Video
You are now ready to create Roles and Application Journeys:
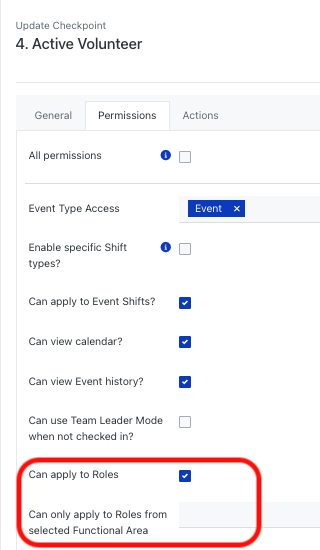
Checkpoint Settings
Within each checkpoint, under the permissions tab, you will need to select 'Can Apply to Roles'
You can also restrict applications to specific Functional Areas