Self check in can be a useful option to save time for your Event and Shift Leaders. It is a feature that does what it says on the tin. Let people Self Check In to their shifts.
Letting the users check in to their shifts themselves can free up time for you and your leaders to, instead of focusing on the people management, focus on the event itself.
Setting up Self Check In
There are two ways to set up Self Check in. One through the Event settings page, and the second through the Shift settings page. These two slightly different pathways will be detailed below:
A) Event Settings
When creating an Event if you would like all the shifts to have Self Check In, it's best to set it up via the Event Settings before creating all the shifts. Click on the Shift Defaults tab (highlighted in red below).

When you're in the Shift Defaults tab in the Event Settings, scroll down to the box Allow Self Check In? (highlighted in red below) and click it to activate it and view the drop down for the Self Check In settings.

B) Shift settings
If you are adding Self Check In to a particular Shift, or after the shifts have already been created, you will set it up in the Shift Settings. Click on the Check In tab (highlighted in red below) to access the Self Check In settings.

When you are in the Check In tab click the Allow Self Check? In tick box (highlighted in red below) to activate it and view the drop down for the Self Check In Settings.

Following both A) and B) will lead to the the Self Check In Settings to drop down when the tick box is selected which is as below:
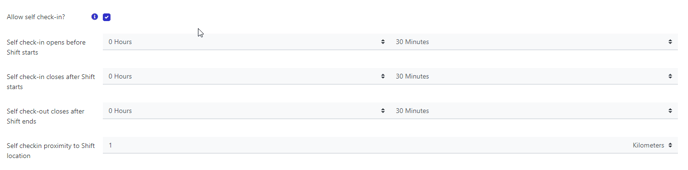
Self check-in opens before Shift starts - Use the drop down to select how many hours/minutes before the shift starts you want the user to be able to self check in on their dashboard. There will be no check in button in the dashboard until the time period chosen before the shift starts.
Self check-in closes after Shift starts - Use the drop down to select how many hours/minutes after the shift starts you want the user to be able to check in on their dashboard. There will be no check in button in the dashboard after that time period has passed.
Self Check-out closes after Shift ends - Use the drop down to select how long after the shift finishes the check out button will stay on their dashboard.
Self check-in proximity to Shift Location - This box allows you to limit the distance in that the user is allowed to self check in within. Chose between Kilometers/Meters/Feet/Miles and set the radius from the pin point on the map location in which they will be able to check in. To allow a user to self check in from any location leave the field blank.
Note: Setting the proximity to a shift location for self check in will mean that when users try to self check in they will be asked permission from their device to check their location. A mobile device will usually do this from the GPS location but a non-mobile device will use the network it's connected to. There is not a guarantee that the location of the user in real space matches where their device says they are.
Once all the settings have been selected click Save to save the changes and apply to the shift(s).
Self Check in has now been set up.
Bulk update Self Check-in
If you would like to allow Self Check-in for all shifts you can do this in one easy step by using the bulk update option under actions in shifts.

How it Appears on the User Side
The users will have an easy experience checking in via their Dashboard.
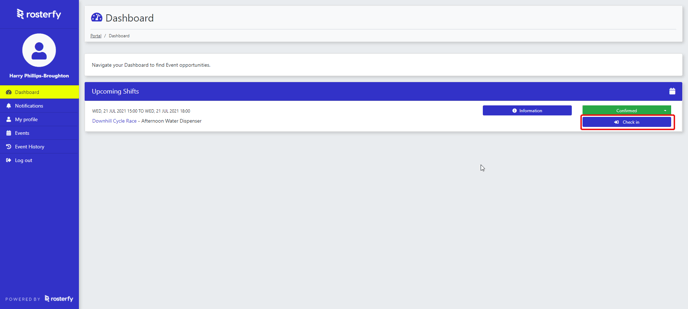
When a user logs in to their dashboard, they will be shown their Upcoming Shifts.
If they are within the period where Self Check In is open they will have a Check In button
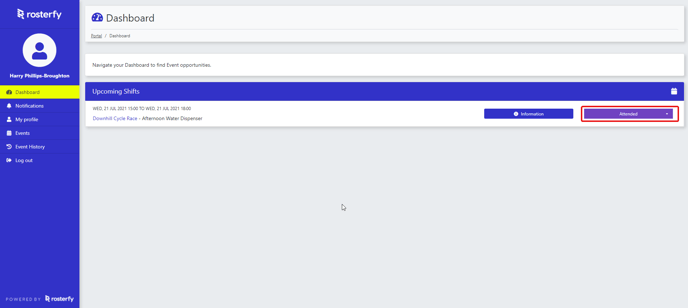
When they are checked in in they will then appear as Attended in their dashboard
You may also be interested in reading some related articles: