Create/Edit Custom Fields
- Go to Settings in the main navigation bar
- Select Custom Fields
- Click Create/Edit
- Complete the custom field form by adding each parameter to the custom field
- Name -This is the name visible on the form
- Code - A unique identifier simplified for advanced system usage, you can leave the default value
- Entity - The type of custom field this will be. This will determine where it appears in Rosterfy
- Select Field type - you can find a summary of field types here
- Select additional options that you need for the custom field
a. Recommended allowing the field to be used in communications and is
searchable/filterable
- Click Save
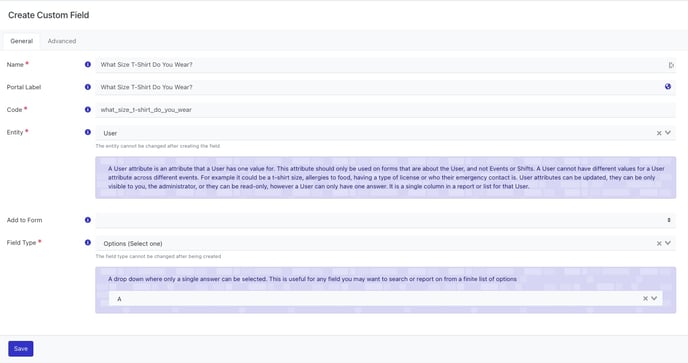
Example User Custom Field creation screen
Create a field visible to admins only
- Go to Settings in the main navigation bar
- Select Custom Fields
- Click Create/Edit
- Complete the Custom Field form by adding each parameter to the Custom Field
- Name -This is the name visible on the form
- Code - A unique identifier simplified for advanced system usage, you can leave the default value
- Entity - The type of Custom Field this will be. This will determine where it appears in Rosterfy
- Select Field type - you can find a summary of field types here
- Select additional options
a. Recommended to allow the field to be used in communications and is
searchable/filterable
- Toggle On Can only be view by admins
- Toggle On Can only be modified by admins
- Click Save
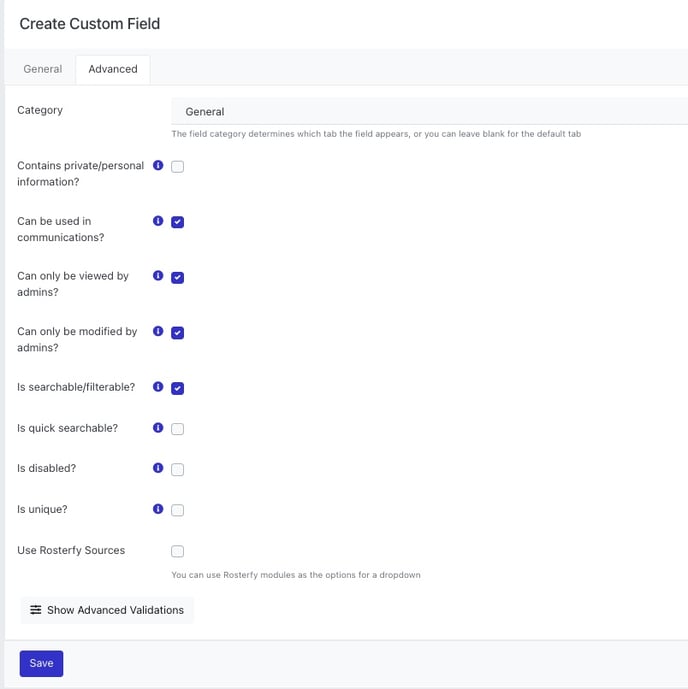
Example admin only user custom field
Once a custom field has been created you can organize it using the Advanced tab by adding a custom field category.
You can use the below documents to upload options automatically for multiple select type
- Gender.csv
128 Bytes Download
- Educational levels.xlsx
9 KB Download
- Job titles.xlsx
20 KB Download
- Language spoken.xlsx
20 KB Download
- T-shirt size.csv
106 Bytes Download
- Relationship to you.csv
240 Bytes Download
- Volunteer skills.xlsx
10 KB Download
- Yes No.xlsx
8 KB Download
- Dietary Requirements.csv
207 Bytes Download
- Employment Status.csv
339 Bytes Download
- Marital status.csv
199 Bytes Download
- ethnicity.csv
1018 Bytes Download
- Nationalities.csv
6 KB Download