About Events
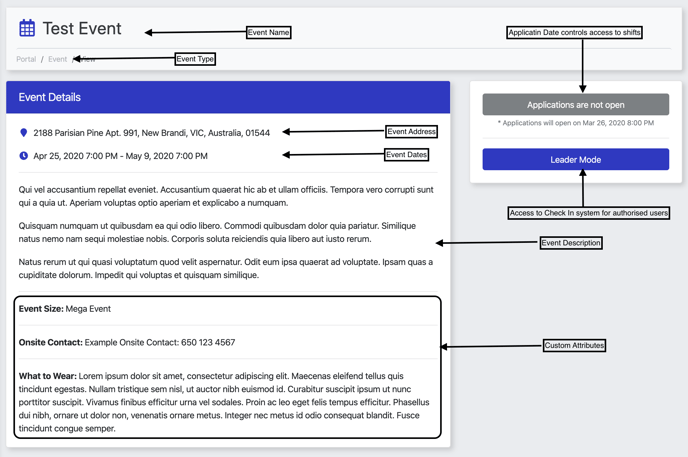
An event in Rosterfy is a collection of shifts which users can be scheduled onto. The event allows a centralized mechanism for you to put similar information, settings and requirements that can then be used when setting up your shifts. All event attributes can be communicated as mail merge tags as well as downloaded in reports. An example portal event page can be seen below, and in this article we will look at how to modify each of these components
The event settings are all inherited from your default account event settings. This means you can set a number of settings once, and every event you create after that will use these settings by default. On each event you can overwrite these where needed. This ensures that every event has the exact workflow you need. Every shift on an event draws in its settings from the event settings as well by default.
Navigating to create event
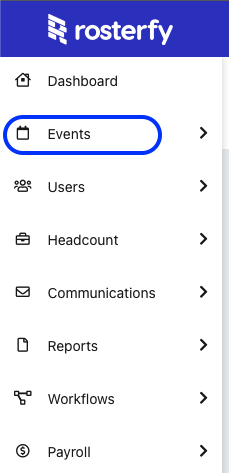
To create a new event, navigate to the event list page by clicking 'Events' in the left navigation bar
From the event list page, click the Create button to begin creating a new event.

The 'Create Event' page presents a number of options for configuring the event to suit your needs.
Note: Depending on your account package, you may not see all the options presented below.
Note: The types of statuses will determine if a user signing up to a shift counts towards the total demand. If there are 6 positions available for example, statuses of applied and emergency do not count towards demand, meaning unlimited numbers of people can sign up. A status of pending or confirmed will count towards demand, meaning only 6 people can signup.
You can view the article Selecting the correct Event status for more information
Event Settings
| Control Name | Tab | Functionality | Overwrite In Shift Settings |
| Type | General | All events of the same type are grouped together in the side menu of the portal. Clicking on the side menu item will give the user access to all events of that type | N/A |
| Name | General | Available in reports, lists, filters, mail merge tags and the portal, the name is the attribute used to differentiate one event from another. | N/A |
| Timezone | General | The timezone the event will operate. This controls how the times appear in the portal for users in other timezones. This is also important for automated system functionality to be accurate | N/A |
| Start Date/Time | General | Events with start dates in the future only will appear in the portal, or where the start date is less than the current date and the end date is still in the future. This date is shown on the portal event page and is available as a mail merge tag | N/A |
| End Date/Time | General | This date is shown on the portal event page and is available as a mail merge tag. If the end date has not passed yet, the event will still appear in the portal | N/A |
| Applications Open Date/Time | General | The date that users may begin applying for an event. Before this date/time, users can see the event in the portal, but cannot apply to shifts | N/A |
| Applications Close Date/Time | General | The date the users must apply before. After this date/time, users will no longer be able to apply for shifts. | N/A |
| Description | General | Rich text allowing images, links and any other generic information about the event. This content is the first piece of information on the portal event page | N/A |
| Street Address | General | Shown underneath the event name in the portal, this attribute can also be used in communications | Yes |
| Choose a Training | General | Training modules to be assigned to all users when they signup for any shift on this event | Yes - you can add additional training per shift |
| Publish | General | This is the control that above all else determines if an event is available in the portal. If it is turned off, the event will not be visible anywhere and available for users to apply regardless of date and time settings. | Yes |
| Default Shift User Status | Settings | The status that all users will be given when they sign up to any shift. See note above about counting towards demand | Yes |
| Maximum Shift Applications per User | Settings | Total number of shifts a user can apply to with a status that counts towards demand, ie, withdrawn statuses do not count towards maximum | No |
| Default Shift Confirmed User Status | Settings | Status given when a user confirms their capacity to attend a shift from an email confirmation link | Yes |
| Default Shift Rejected User Status | Settings | Status given when a user clicks the withdraw link in an email | Yes |
| Default Shift Checked In User Status | Settings | Status given to a user when they are checked in for a shift | Yes |
| Default Shift Application Form | Settings | Form a user must complete when they apply for any shift | Yes |
| Default Shift Check-In Form | Settings | The form that must be completed at the point of check in. You cannot complete the check-in process without completing the form | Yes |
| Default Shift Attended Form | Settings | The form that can be completed at anytime while a user is on a shift. This can be used as an interview tool, or for questions that need to be completed but will not interfere with the check-in/out procedure. | Yes |
| Default Shift Check-Out Form | Settings | The form that must be completed at the point of check out. You cannot complete the check-out process without completing the form | Yes |
| Show Only for User Groups | Settings | This controls showing the event only to users in the groups chosen. More than one group can be chosen. | Yes |
| Hide From User Groups | Settings | This controls if an event should be hidden from any users. If a user is in a group both for hide and show, the event will be hidden | Yes |
| Certificate | Settings | This determines which certificate should be provided to the user at the completion of the event. This setting is still in development and is for future expansion | No |
| Users Can Withdraw From Shifts | Settings | Controls whether a user can withdraw from their shifts after they have been allocated | No |
| Allow Self Check In | Settings | When turned on, you can choose a timeframe within which a user can self-check-in to a shift. This means team leaders do not need to complete the check in process. | Yes |
| Check-In Visible Attributes | Settings | This controls which attributes are shown to a team leader on the check in screen. | Yes |
| Custom Attributes | Custom Attributes | This tab is available for you to set values for all the custom attributes that are setup as Event-Attributes. | N/A |
Note: Adding team leaders to an event is not possible until after the event is created.
Once the event is setup to suit your needs, you can click Save and you have finished creating a new event. To find out about creating shifts, click here