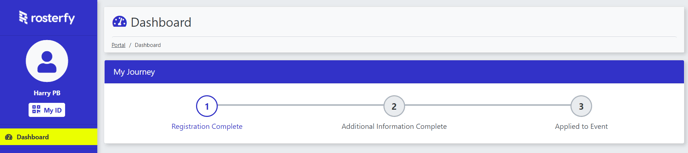
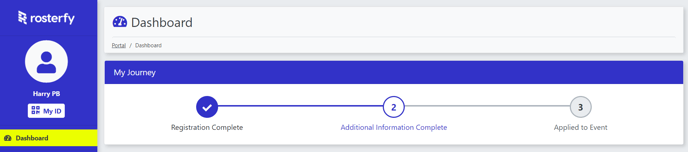
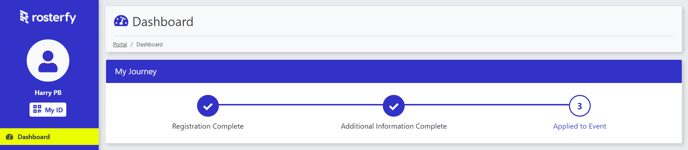
Checkpoints are the method in which users are guided through the platform.
Using Checkpoint Types, the Users can get a sense of that journey, by using a visual queue in their portal dashboard.
This can be updated as they progress through the workflow with different steps.
This will appear as a My Journey section. See below for a basic example.
Creating Checkpoint Types
Access the Checkpoints section by following Workflows > User Checkpoints.
In the Checkpoint menu, there will be a button Types (see below highlighted in red).

This will open the Checkpoint Types list.
To add a new Checkpoint Type Click Create.
Fill out a Name for the Checkpoint Type.
Fill out a Name (Portal) - this is what will appear on the Users Portal.
The Is Public tick box is important. If this is not ticked it will not be part of the visualisation.
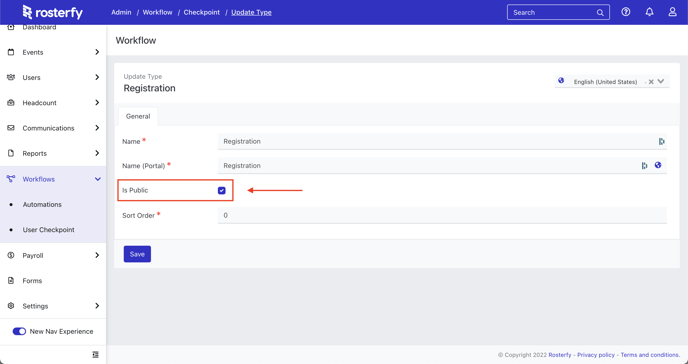
Click Save to create the Checkpoint Type.
Sorting Checkpoint Types
The order of the Checkpoint Types in the list determines how the Visualisation looks.
There is a mix of Public and Not Public which can only be seen in the Checkpoint Type Settings (unless you name them).
The ID does not reflect the sort order. Just the order of creation.
The Sort Order Is from Top to Bottom and the Checkpoint Types can be dragged to move.
How this is reflected on the Portal Dashboard is shown below.
Note - The Checkpoint type Checkpoint - Not Public in the list above is not reflected in the visualisation.

Assigning Checkpoints a Checkpoint Type
Checkpoint Type Is Assigned in the Checkpoint Settings.
The current type will be shown under the Column Type in the table.
To change a Checkpoint Type click the Settings cog.
Then click Update.

Inside the Checkpoint Settings, there is a Type field that will have a dropdown box of all the Types that have been created (see below)

Once changed to the required Checkpoint Type click Save.
Example of the Visualisation
Below is a basic example of how the Visualisation changes as the user progress through the Checkpoints and associated Checkpoint Types. Set up with Three Public Checkpoint Types.