Creating a Group
To create a group based on, either standard or auto-update, follow the steps below:
1. Click Users
2. Click Groups
3. Click Create

4. Name your group.

5. Decide if you would like to use the Auto Update feature. An auto update group will automatically pull additional users who meet the criteria on which the group has been established into the group. The auto-update options are:
- Disabled - No automatic update
- Add and Remove - Automatically add or remove user based on the rule criteria
- Add Only - Automatically add users based on the rule. This can be useful to monitor users that have a particular attribute or have had a previous checkpoint.
- Remove Only- Remove users automatically based on the rule. This can be useful for refining a list of users after they have completed a task.
6. Optional Add Rule. Once you have selected an Auto Update option, you will have the option to add rules to your Auto Update group. For example, this could include adders to a group who answer a profile form question in a specific way, or those who are group leaders. To add a Rule:
- First select the field.
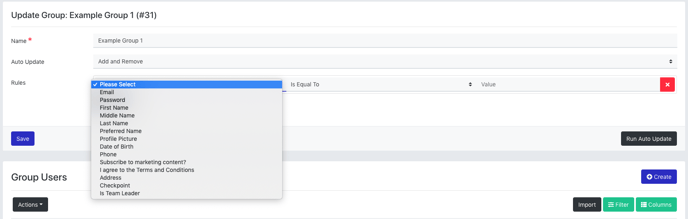
- Then select the rule.
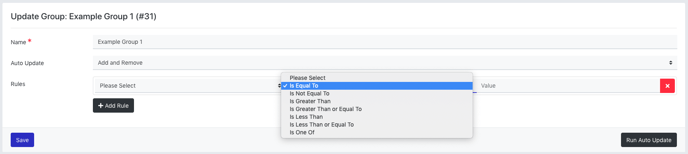
- And lastly, set the value that the field must equal in order to be added to the rule.
- You can set up multiple rules.
- Once you have added rules, click Run Auto update to add users who meet the rule to the group.
7. Save
Once the group is created you can use the action button to Send Email, Send SMS, Send Notification, Update User Status and upload group members.
Copying a group
You can Copy a group in the Group List.
If you need to create a group with similar or the same auto update rules you can Copy a group and then update the rules as required. This can help save you time.
1. Navigate to the User Group list.
2. Select the Group you would like to copy.
3. Click on the Settings toggle.
4. Click on Copy.
