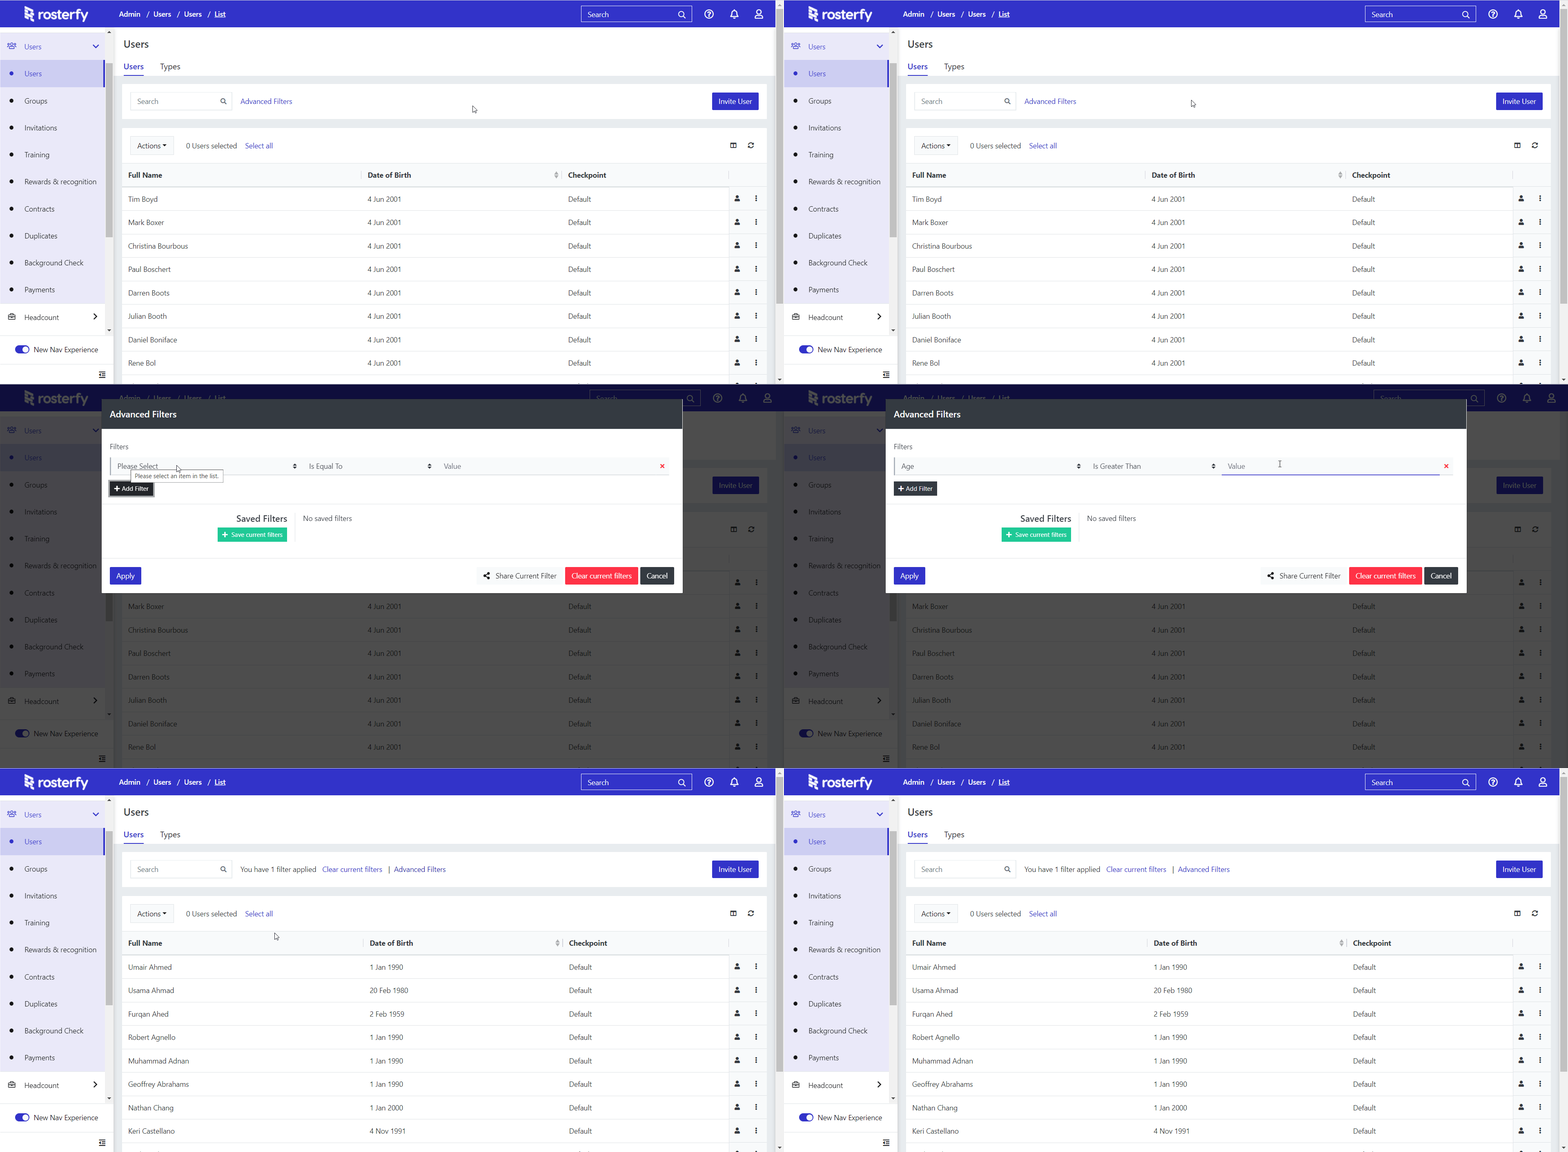
Advanced Filters are a feature that can be found in various locations across Rosterfy. When we have a table that is displaying different information we can usually apply a filter to that table based on various criteria.
Example locations the Advanced Filters can be applied are the User List, Event List, Shift List and the Role Offers List.
Using Advanced Filters can be helpful to manage the tables so they only display information relevant to what you are working on. Default fields will always be able to be used in the Filter, and any Custom Field created will be able to be filtered by if they are Filterable in the Custom Field Advanced Settings.
Filters can also be saved to be easily used again, as well as shared with other admin users.
Applying an Advanced Filter
1. Click on the Advanced Filter button.
2. Click on the Add Filter button.
3. Select the criteria to filter by from the drop down list.
3. (Optional) more that one criteria can be selected by clicking the Add Filter button again.
4. Click Apply.

Saving an Advanced Filter
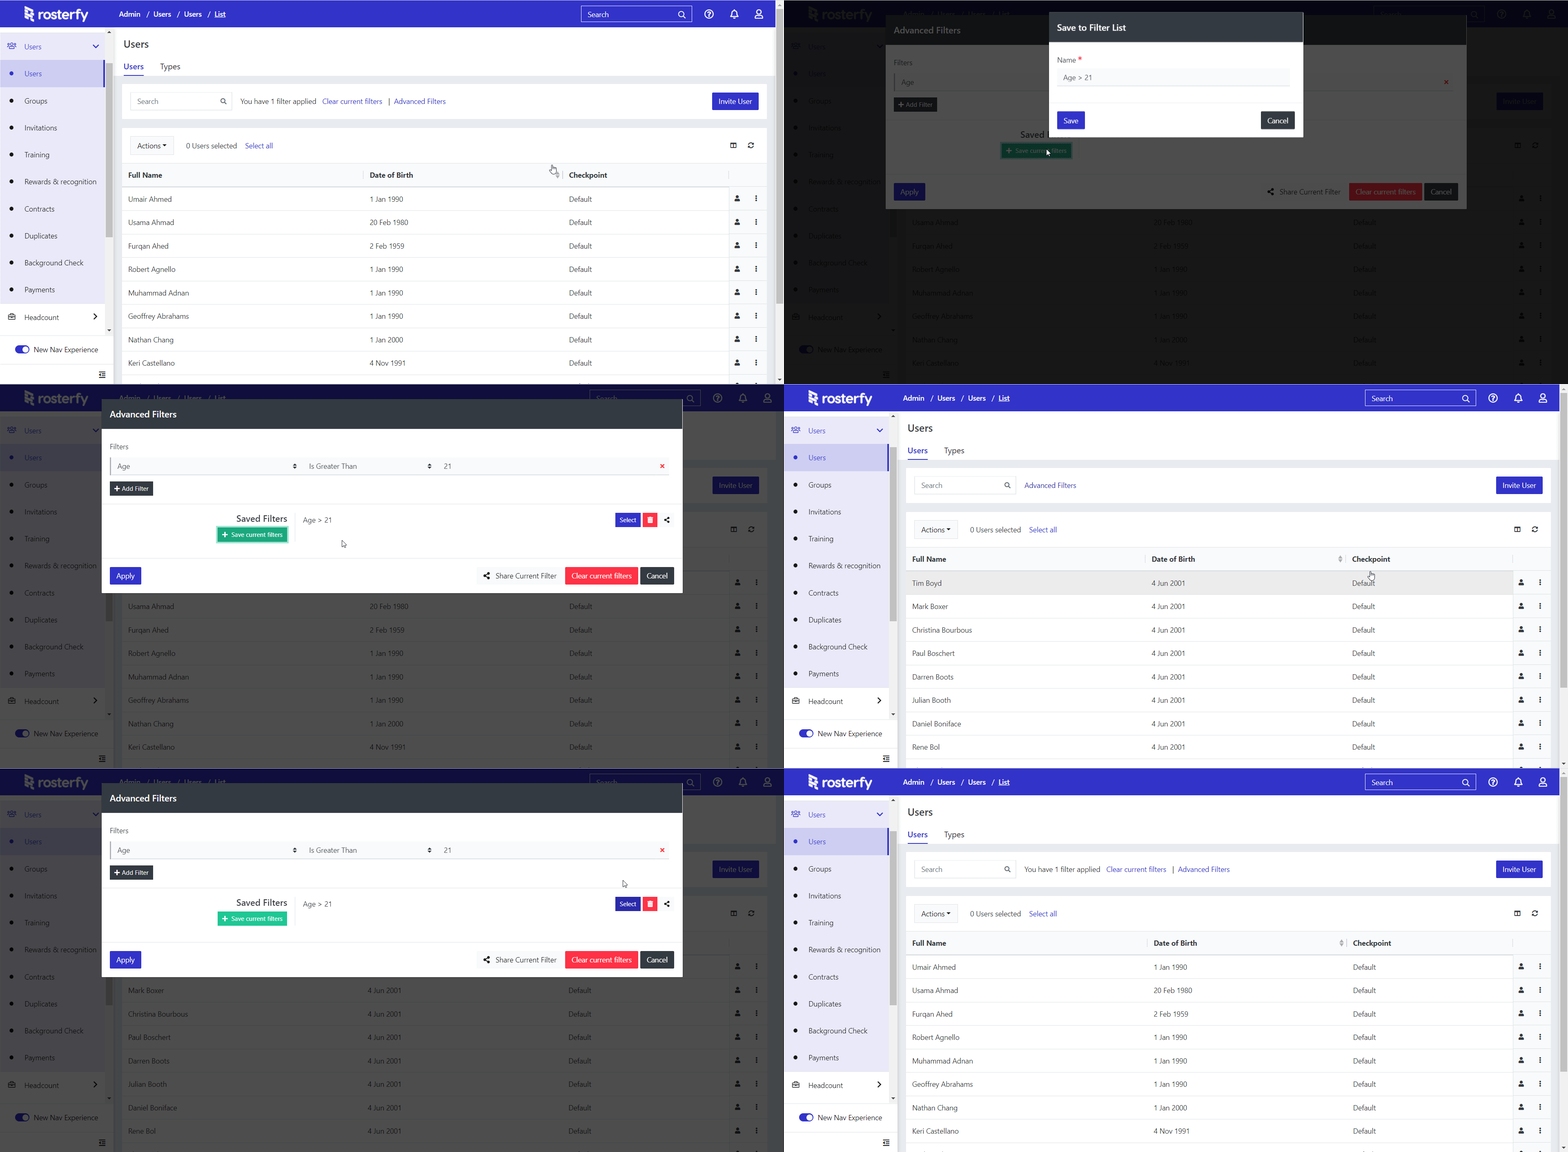
If a filter is going to be used regularly but swapped between it may be worth saving the configuration. Any saved filter will be able to be added easily as it will be displayed in the saved Filters List.
1. Click Advanced Filters with the Filter currently applied.
2. Click the Save Current Filter button.
3. Name the filter
4. Click Save.

Sharing an Advanced Filter
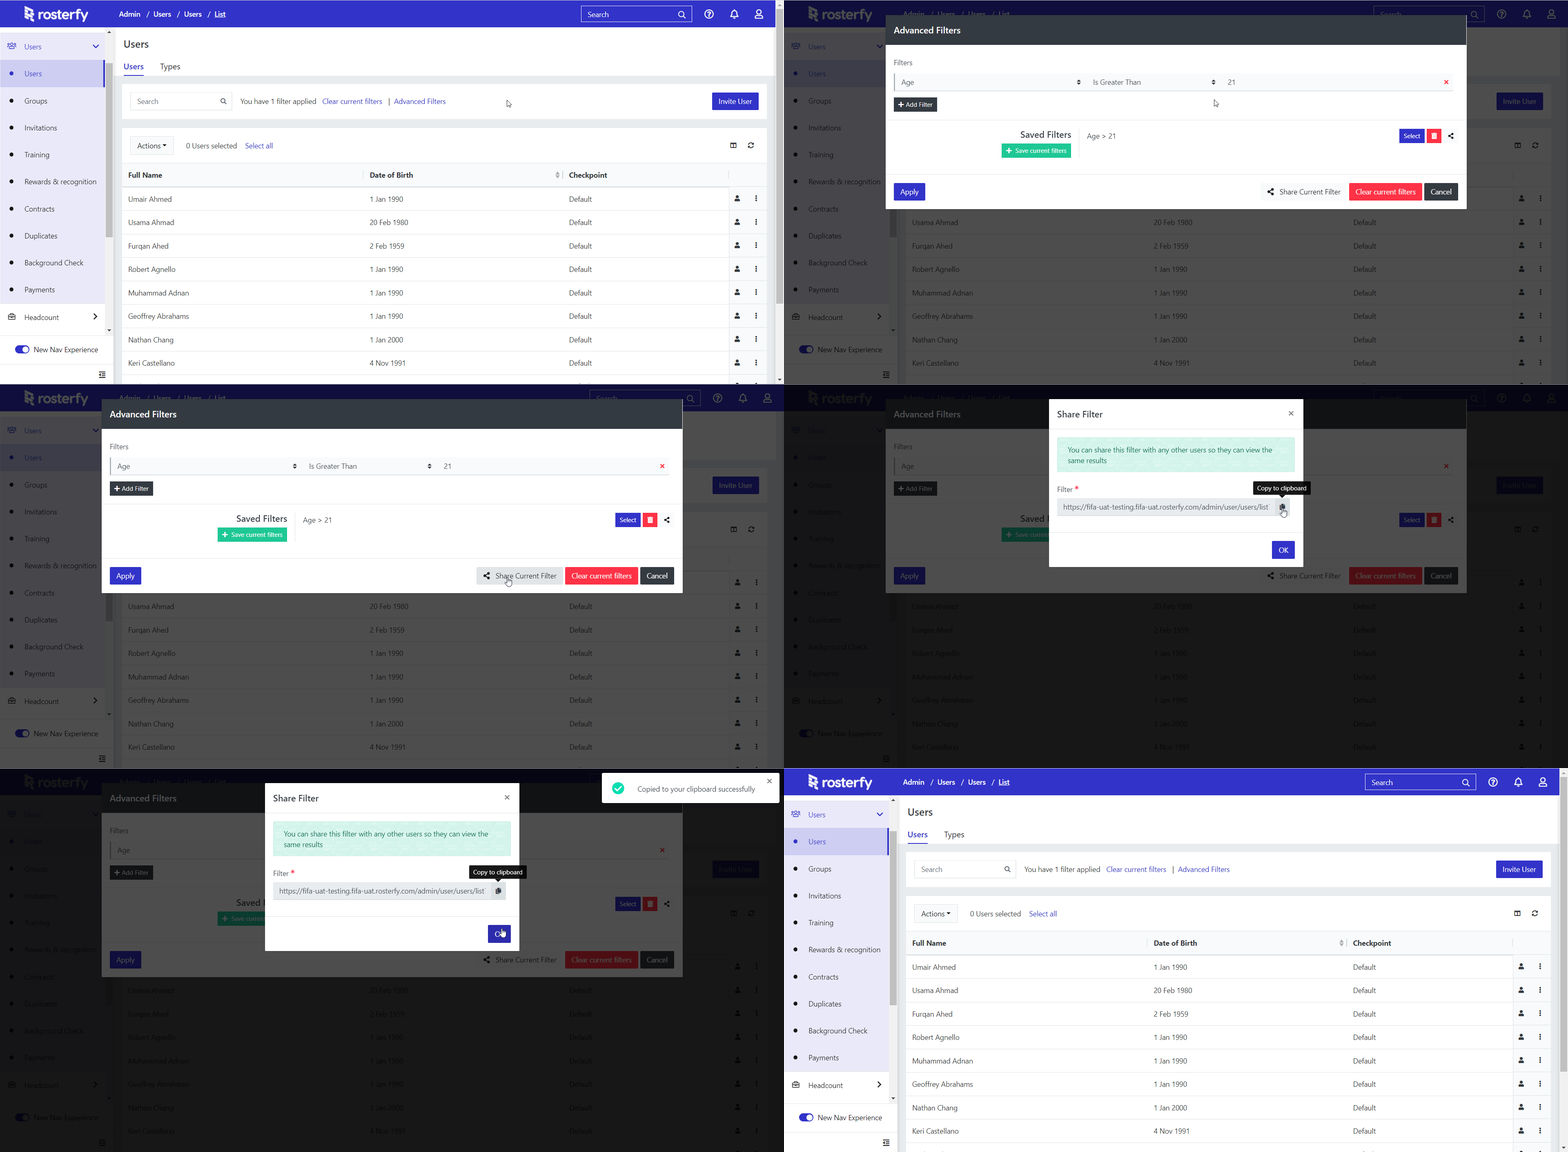
Advanced Filters can be shared with other admin users. This can be useful if you have a complex filter set up and want to make sure they are able to follow the filter exactly. This is managed with a URL that can be given to the other users which will load the page with the filters as you have selected.
1. Click Advanced Filters.
2. Click Share Current Filter.
3. Click the Copy to Clipboard button to copy the filter URL
4. Share the URL with Admin Users who need to use the filter.

Creating a 'Favourite' filter
Once you have saved a filter, click on the 'star' icon to make the filter a favourite.
Favourite filters will act more like a 'quick filter' and appear directly on the listing as a button.


