Once you have created custom fields, you may need to add them to a form. The most common action would be adding a user attribute to the registration or profile form, however any attribute can go to the relevant form.
Navigate to Forms > List.

Search or locate the form you want to edit, click More Actions > Update.

The Form Builder will be shown, for more information on using the form builder, check out this article.

Each attribute has a number of options related to how it will operate in the form. To configure an attribute click the Configure button. The green asterisks shows which fields are currently marked as mandatory. Some fields are mandatory for Rosterfy and you cannot change.
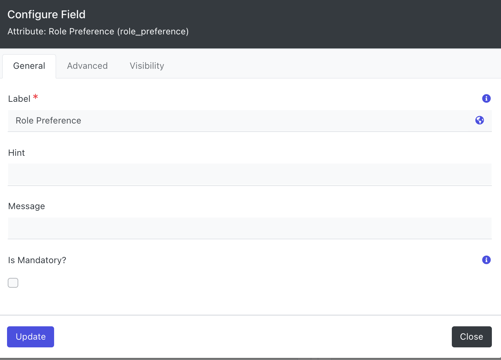
In the configuration pop-up, you can manage whether an attribute is mandatory and set a label for that attribute. The label is how the attribute will appear on the form. This allows the form to show something like 'Do you have any dietary requirements' while in the admin console it is 'Dietary Requirements'. By default the label will match the attribute name.
You can also add a Hint or Message to an attribute.
A Hint will appear as a tool tip next to the attribute (blue 'i').
A Message will appear underneath the attribute, in a smaller and italic font.
You can also add static content to a form by using the Add button.
The two types of static content you can add are page breaks and rich text. A page break will put the subsequent attributes onto an additional page. You can drag and drop static content the same as attributes. The rich text static content allows you to put additional information into a form, images, links and other content that may be relevant to the user